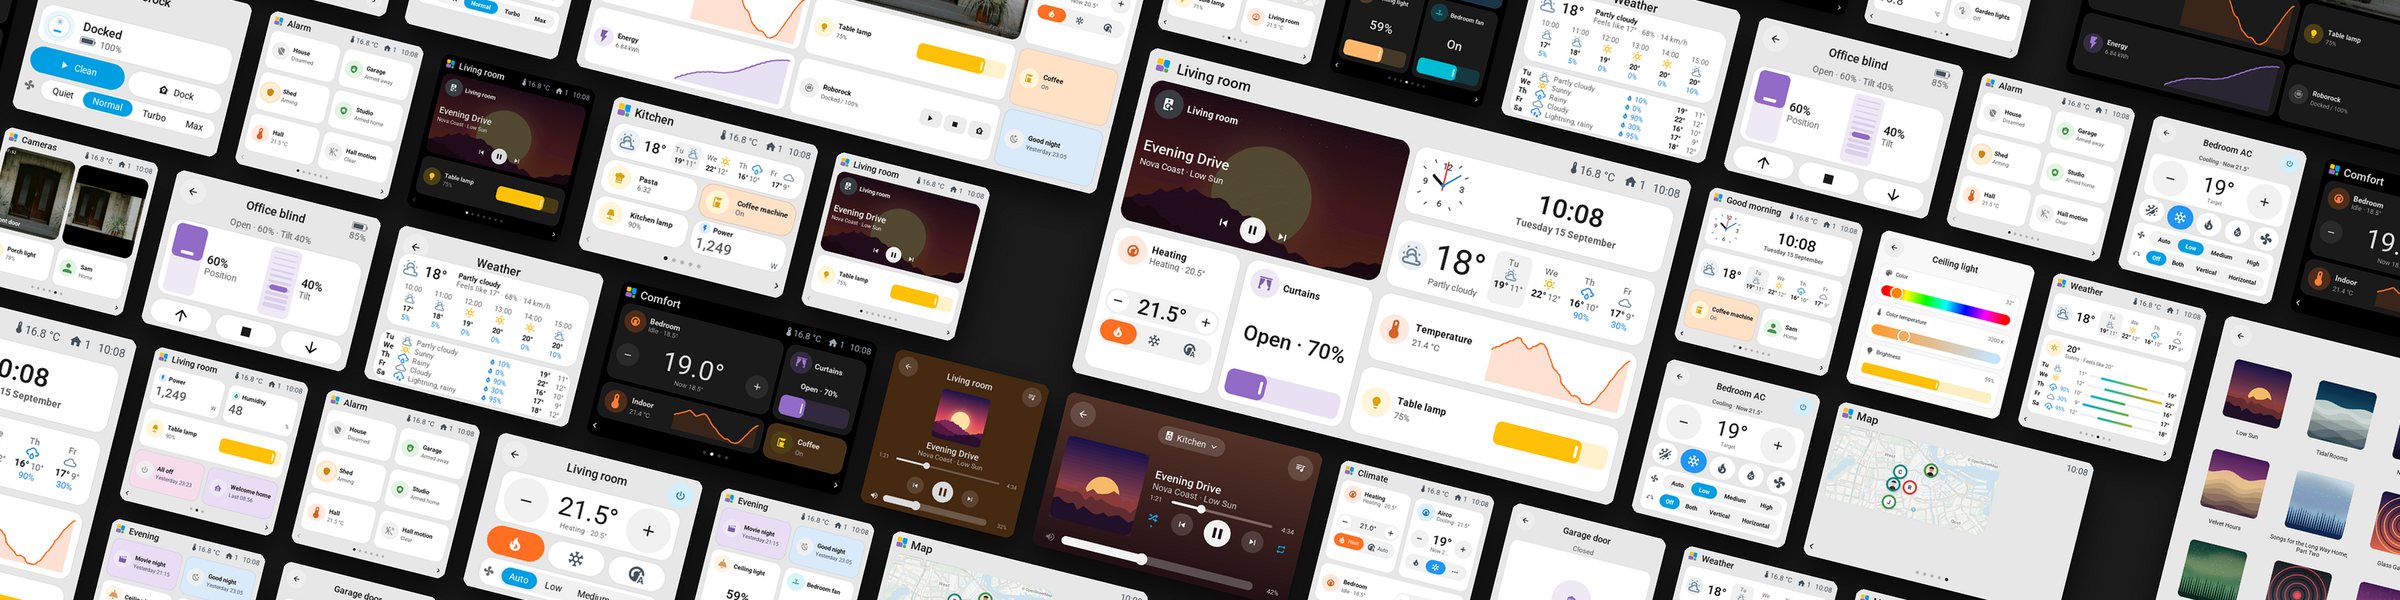

Touch screens for Home Assistant. A screen for every room, one simple editor.
Website · Quick start · Supported screens · Community · My screen works

Tessera is not in the standard App store. This button adds its repository to your Home Assistant. After that, Tessera Screen Manager is in the store like any other app.
Tessera is the new name for ESP Screens. In Home Assistant the app is called Tessera Screen Manager and its panel Tessera (app 0.3.18); the repository, the add-on and your screens stay exactly as they are.
Looking for e-ink? Tessera is for colour LCD touch screens. For calm dashboards on e-ink panels, have a look at Tesserae (tesserae.ink), a separate open-source project for Home Assistant with a similar name.
Thank you! I work on this project with a lot of love, and every bit of support helps. I truly love the Home Assistant community.
I lead Tessera's development and maintenance, with contributions from the community. Your support gives me more time to build, review and test improvements. A small monthly contribution or a one-time coffee is welcome.



A touch screen for every room that you lay out yourself, and manage from Home Assistant. Incredibly easy to set up and to use.
Why. Your phone is in the other room and a tablet on the wall is expensive. A small ESP32 touch panel costs a fraction of that, sits on a table or in a wall box, and is always at hand for the lights, the heating or the vacuum.
What. Firmware for affordable panels, five of them today, from the 2.8-inch CYD to the 10.1-inch Guition, with tiles over up to eight pages, or more on the boards with the memory for them, as many per page as the glass holds: lights, climate, humidifiers, blinds and curtains, the vacuum, media, the weather, history graphs, the energy of your house live, clocks and timers, your alarm with its keypad, and your cameras and a map of where everyone is on every screen with room for pictures. A tile can take the whole page, one big switch you push without looking, and a tile can go to another page. An automation can put an alert on every screen when someone rings the bell, and a screen with room for pictures shows who is there with the doorbell camera's picture. A tap can run any action Home Assistant has for a tile, and Dark mode suits a screen beside the bed.
How. Tessera Screen Manager is an app inside Home Assistant. It flashes a new screen over USB, updates it over Wi-Fi and sends it your tiles. Changing a screen is pick, drag and Save & send: no reflash, no YAML to write, no blueprint, MQTT or token. Brightness, night hours and Dark mode can also be changed on the screen or by an automation, and your own YAML for one screen survives every update.
Install it · The manual · Pages · Screen settings · Troubleshooting · What's new
The manual is on the Tessera website: from the quick start to every tile, every screen setting, every supported screen and troubleshooting, with search. Anyone with a GitHub account can improve a page with Edit this page. This README is the overview; the files under
docs/are the reference for contributors.
GitHub Issues are for bugs only. Feature requests, improvements and new board requests posted on GitHub will not be reviewed. Submit and discuss them on the Tessera wishlist. Questions and general discussions are handled in Community, not GitHub Discussions.
- Features and improvements: search the wishlist. Upvote an existing wish or add your own.
- New ESP boards and displays: use the New boards category. Include the exact model, a product link and whether you can test it. Votes show how many people would use it and help set priorities. They do not guarantee support or a release date.
- Questions and examples: post in Community, where the earlier GitHub conversations and replies have moved.
- Bugs: use GitHub Issues for something that is broken in existing functionality. Include reproducible steps and version information.
- Code changes: open a pull request and link the bug or website wish it implements.
Sign in on the website with GitHub to vote, post or reply. Search before posting so the conversation and votes stay together.
A Guition in the living room, 37 seconds in one take: tapping tiles, swiping through the pages, opening cards and a history graph, while the lamp behind it goes from purple to orange.
esp-screens-in-use.mp4


Real photos, not renders: the 4-inch Guition next to the lamp it controls.
One home, five panels. A screen is built for the glass it runs on: it measures its own canvas at boot and gives a page the cells that board has, six tiles on the 2.8-inch CYD and twenty-five on the 10.1-inch Guition, while a tile stays about the same size in millimetres. The same tiles, the same cards, the same editor; the bigger the glass, the more of your home fits on one page. Each board starts on the grid that suits its glass, and the editor changes the columns and rows beside the pages, without a new build: the 10.1-inch Guition holds up to forty tiles on a page with eight rows.

To scale, each with the page it fills: the same home on the 2.8-inch CYD, the 4-inch Guition, the 4.3-inch and 7-inch Waveshare, and the 10.1-inch Guition. Rendered from the firmware's own code, one board at a time.


The same home standing up. Every board that is not square hangs either way, chosen when the screen is set up and changed later in the editor without a new build, with a grid of its own: the 7-inch Waveshare 2 × 7 instead of 4 × 4, while the 10.1-inch Guition keeps its 5 × 5 in tall cells. Which board is which, and what to look for when you buy one: Which screen.


Six, seven and eight rows on the 10.1-inch Guition, from thirty to forty tiles on a page, and eight rows in Dark mode. Rendered from the firmware's own code. The editor changes the rows beside the pages, and the layout moves along by itself: what no longer fits on a page moves on to a new page after it. Thanks to Jeroen Peters for the rows.


The energy card shows the power of your house right now, the way Home Assistant's own live Energy view and power-flow-card-plus show it: solar, the grid and the battery around the house, dots that run faster as more power flows, and the devices that draw the most. It reads the Energy settings you already have in Home Assistant, so there is nothing to set up, and a tap on a circle opens that sensor's history. It fits every screen, upright on one standing up (how). Rendered from the firmware's own LVGL code with a made-up house.


Any sensor whose state is a number can show where its value stands: as a ring with the tile's icon inside, as a tape with a pointer on a ruler, or as a bar of LCD cells that fills the tile. Every look fills the tile it gets, from one cell to the whole page, and grows with it. The range comes from Home Assistant (0 to 100 for a percentage) or is the tile's own, and the colour is the sensor's own, one you choose, or two or three segments, green, orange and red by default, that change at thresholds in the sensor's own unit, such as 800 and 1200 ppm. Choose Meter under Display. New in the next release; already on the dev channel. Rendered from the firmware's own LVGL code with made-up sensors.


A tile can be 1 × 2 or 2 × 2 cells as well as one cell, double width or the whole page, and the card follows the room it gets: a player shows its album cover behind the track (every screen but the CYD), the heating shows its setpoint and the modes Home Assistant lists for it (the last key opens the card when they do not all fit), a blind shows its position, and its slats where there is room, and a lamp, a switch, a script or a scene two cells high is one big key. Every board works out the same card from its own glass. Each page has its own title and top bar, any page can be Home, and a page can stay out of the page dots and be opened from a tile, with a Back key to return. Rendered from the firmware's own LVGL code with a demo home.


The weather with the coming days, and on a bigger tile the whole week with a bar from each day's low to its high. A thermostat has its − / + and a bar with a key per mode; an airco shows heat and cool first and the rest behind "…". A live camera on a taller tile fills the card with its picture and its name, or shows the whole picture. Your alarm is a tile in Home Assistant's colours, with a key for every mode and Home Assistant's keypad when the panel asks for a code; someone coming in wakes every screen with the keypad to disarm. A lock locks with one tap and asks for a second one before it unlocks; its card has Open door where the lock can open its latch, and Home Assistant's keypad when the lock asks for a code. A select, such as a washing machine's programme, opens a list with a check at the one it is on. On every screen with the memory for it, every page is built ahead and kept, so the next one is there the moment you turn to it. Rendered from the firmware's own LVGL code with a demo home.


A media player's card sits on the colours of the cover that plays, and the speaker it plays on is at the top: tap it to move the music to another one. Shuffle, repeat and a bar you drag through the track sit under the title. The library key opens what Home Assistant can browse on that player, folder by folder down to a page of covers, and a tap on a cover plays it. A favourite is a tile that plays one playlist, album or artist on the speaker you choose, with its cover behind it, and a player at rest keeps its card, so you pick a speaker and start from there. Nothing here is made for one service: it is the player and its library as Home Assistant reports them, so Spotify works like any other player that can browse. The covers and the library need a screen with the memory for pictures (how); the CYD keeps the card, the speakers and the favourites, drawn with icons. Rendered from the firmware's own LVGL code with made-up records.


A person tile can be a map of where they and the people with them are, and the map tile follows everyone Home Assistant knows the place of, or only whom you choose. Photos in the markers and the same colours as Home Assistant's own maps; a tap opens the map over the whole screen. Tessera draws it in the screen's own colours, light or dark, from Home Assistant's own map tiles, and draws it again only when someone moves; the screen gets a picture, never a location (how). Rendered from the firmware's own LVGL code with a made-up household; map data © OpenStreetMap contributors.

The bedside clock takes a whole page: the time as large as the glass allows, with up to three round keys under it for what you reach for at night. A key is a tile in its round form and does what its tile does: the lamp switches with a tap, the front door asks for a second tap before it unlocks, and the alarm shows how it is armed. With Dark mode and the screen's night hours the page is black and the backlight dims. Rendered from the firmware's own LVGL code with a demo home.


Tap a tile to switch it, hold it for the full card. Keys and sliders right on the tile, pastel colors, a clock, the weather and history you can read with a finger. A lamp with modes (a WLED) gets an effects page with a drum picker, named and filled from what Home Assistant lists for it. Rendered from the firmware's own LVGL code with a demo home.


Cameras are tiles too, not only part of an alert: any camera or snapshot in Home Assistant (a doorbell's last ring, for example) goes on a screen like any other tile. Tap it for the picture full screen, refreshed every four seconds, or let the tile itself show its live picture (Display → Live picture, every 5 to 30 s) over the whole tile, on every size up to a full page, filled or whole, with or without its name; an alert can carry the same picture. Every screen but the CYD, the Waveshare 3.5-inch and the Hosyond 4-inch, which have no memory for pictures (how it works).


The same cards on the 2.8-inch CYD, 320 × 240. The CYD has no memory for pictures: its media card shows the player's icon in the cover's place.


Dark mode, for a screen beside the bed: the same pages, darker. It is a switch on the screen, in Tessera and in Home Assistant, so an automation can turn it on at bedtime.


Settings on the screen itself: hold the top bar. The same brightness, Dark mode, standby, night hours, clock and rotation as in Tessera, and every one of them is an entity in Home Assistant.


Tessera, a page in Home Assistant: every screen at a glance, then the pages of the chosen one side by side with the values Home Assistant reports right now, and the library of your home under them.


Search your home, drop a tile on the preview, tap it for its name, width, control and color, and for what a tap does: open its card, switch it, or run any action Home Assistant has for it, such as the curtains to 50 %. Save, and the screen has it. ⌘K searches screens, entities and actions; Identify blinks a screen so you know which one it is.


A top bar built from your own home, firmware updates over Wi-Fi (every night if you like), and a skill so Claude can rearrange your screens.


On a phone, Tessera is the editor of everyday changes: your screens, a page as the screen shows it, a tap on a tile for its icon and colour, and Add tile. Everything else is in the screen's ··· menu, and Full editor there opens the whole editor.

Screen settings apply at once, and a change made on the screen or by an automation shows up here too.

Other hardware on your board? A CYD with the other display controller is a choice in New screen, and for anything else every screen has an Override YAML of its own, checked by ESPHome before a build and kept through every update.


The same home in German, French and Polish, its rooms and tiles named in each. The screens follow your Home Assistant: its language, its words for a light or a robot, and how your country writes a date, a time and a number: 75 % in German and French, 75% in Polish and English.
The screens, the editor and its messages speak English (US and UK), Nederlands, Deutsch, Français, Italiano, Español, Português, Polski and Magyar. Nothing to set up: Tessera takes the language of your Home Assistant.

Settings → Language & region, when you want something else than Home Assistant's own.
- The editor follows the language of your Home Assistant profile, so two people in one house each read their own.
- A screen carries one language, built into its firmware: change it and press Update on the screen (or let the nightly round do it). The clock (24 hours or 12 with AM/PM) and the number format change straight away, on every screen at once.
- Words from Home Assistant stay Home Assistant's: what a door, an airco or a robot says on a tile and in its card is the word its own dashboard shows, in your language.
Most languages still need someone who speaks them to read the texts through, and a new language is one file. Translating Tessera walks through both; a language without a file falls back to English while it keeps your country's clock and numbers.
Someone at the door? One event in an automation wakes every screen and shows it. Add the doorbell camera and a Guition shows who is there; tap the picture, or a camera tile, for the camera full screen, refreshed every few seconds. Camera images.


Any alert, on one screen or all of them, in a pastel color of your choice, with one button or two to choose from, each in a color of its own and with its own action. How alerts work. An automation can also put a page in front, such as the page with the full-page player when the music starts: Open a page from an automation.
| Screen | Resolution | Display / touch |
|---|---|---|
| CYD ESP32-2432S028 | 320 × 240, 2 × 3 tiles | ILI9341 / resistive XPT2046 |
| CYD ESP32-2432S028 with ILI9342 (experimental) | 320 × 240, 2 × 3 tiles | ILI9342 / resistive XPT2046; hardware acceptance pending |
| Guition ESP32-S3-4848S040, 4 inch | 480 × 480, 2 × 3 tiles | ST7701S RGB / capacitive GT911 |
| Waveshare ESP32-S3-Touch-LCD-4.3 | 800 × 480, 3 × 3 tiles | ST7262 RGB / capacitive GT911 (backlight always on: no standby, no night) |
| Waveshare ESP32-S3-Touch-LCD-5 (new) | 800 × 480, 3 × 3 tiles | RGB / capacitive GT911, the 4.3-inch's board with 5-inch glass (backlight always on: no standby, no night; details) |
| Guition JC8048W550C_I, 5 inch (experimental) | 800 × 480, 3 × 3 tiles | ST7262 RGB / capacitive GT911; dimmable backlight, the capacitive variant only (details) |
| Waveshare ESP32-S3-Touch-LCD-7 (experimental) | 800 × 480, 4 × 4 tiles | RGB / capacitive GT911; backlight always on, hardware acceptance pending (details) |
| Waveshare ESP32-S3-Touch-LCD-7B (experimental) | 1024 × 600, 4 × 4 tiles | RGB / capacitive GT911; dimmable backlight, hardware acceptance pending (details) |
| Sunton ESP32-8048S070, 7 inch (experimental) | 800 × 480, 4 × 4 tiles | RGB / capacitive GT911; dimmable backlight, hardware acceptance pending (details) |
| Waveshare ESP32-S3-Touch-LCD-4B, 4 inch (experimental) | 480 × 480, 2 × 3 tiles | ST7701S RGB / capacitive GT911; dimmable backlight, hardware acceptance pending (details) |
| Waveshare ESP32-S3-Touch-LCD-3.5 (new) | 480 × 320, 2 × 2 tiles | ST7796 SPI / capacitive FT6336; dimmable backlight, no camera pictures (details) |
| Hosyond ESP32-32E, 4 inch (experimental) | 480 × 320, 2 × 3 tiles | ST7796 SPI / resistive XPT2046; dimmable backlight, no camera pictures, hardware acceptance pending (details) |
| Guition JC3248W535, 3.5 inch (new) | 480 × 320, 2 × 2 tiles | AXS15231B QSPI / capacitive AXS15231B; dimmable backlight, camera pictures |
| Guition JC8012P4A1, 10.1 inch | 1280 × 800, 5 × 5 tiles | MIPI-DSI JD9365 / capacitive GSL3680, ESP32-P4 (new) (details) |
| Guition JC8012P4A1 V2, 10.1 inch (experimental) | 1280 × 800, 5 × 5 tiles | MIPI-DSI JD9365 / capacitive GSL3680, early ESP32-P4 with the newer LCD; hardware acceptance pending (details) |
| Guition JC8012P4A1 V3, 10.1 inch (experimental) | 1280 × 800, 5 × 5 tiles | MIPI-DSI JD9365 / capacitive GSL3680, rev3 ESP32-P4; hardware acceptance pending (details) |
| Waveshare ESP32-P4-86-Panel-ETH-2RO, 4 inch (experimental) | 720 × 720, 2 × 3 tiles | MIPI-DSI ST7703 / capacitive GT911, ESP32-P4; dimmable backlight, Wi-Fi only (details) |
| Guition JC1060P470 and JC1060P470 V2, 7 inch (experimental) | 1024 × 600, 4 × 4 tiles | MIPI-DSI JD9165 / capacitive GT911, ESP32-P4; hardware acceptance pending (details) |
| Guition JC4880P443, 4.3 inch (experimental) | 800 × 480, 3 × 3 tiles | MIPI-DSI ST7701 / capacitive GT911, pre-v3 ESP32-P4; dimmable backlight (details) |
| Elecrow CrowPanel Advanced 10.1 inch, ESP32-P4 (experimental) | 1024 × 600, 5 × 5 tiles | MIPI-DSI EK79007 / capacitive GT911, pre-v3 ESP32-P4, V1.1 or V1.2; dimmable backlight, speaker and microphone (details) |
| M5Stack Tab5 (ST7121 variant, new) | 1280 × 720, 3 × 3 tiles | MIPI-DSI ST7121 / capacitive ST7121, ESP32-P4; hardware tested (details) |
Each screen links to its page on the Tessera website, with what owners report about it.
Got your screen working? Tell the next person. Whether a board is worth buying is something only owners can tell. On the website, My screen works records your exact board, its firmware version and whether the display, touch and connection work, one report per account and board. It takes a minute (you sign in with GitHub), and it is how an experimental board becomes one people can buy with confidence. Something not right? Report a problem there, or open an issue here.
Use these exact board variants: similar-looking product names can have different controllers or connectors. Wallbox relays are not controlled by default; a 4-inch Guition with relays can switch them through its Override YAML (docs/GUITION.md).
The one we use ourselves is the 4-inch Guition, and it has been good to us: bright, responsive touch, and it has been on the wall for months without a hiccup. We buy it here: Guition ESP32-S3-4848S040 on AliExpress. AliExpress being AliExpress, that link may go dead at some point. If it does, search for "ESP32-S3-4848S040" and check the listing says 480 x 480, ST7701S and a capacitive GT911 touch panel before you order.
Tessera builds with its own ESPHome 2026.9.0. The firmware also builds in your own ESPHome Device Builder with ESPHome 2026.6.2 or newer; the 10.1-inch Guition asks for 2026.8.0 or newer, because its touch panel is newer than that.
The 10.1-inch Guition is new in this release and has not yet been through our own acceptance test: its
hardware was worked out and flashed on a real panel, and the screens' own software is the same on every board,
but the two have not stood on one desk together. Tell us how it goes. It needs a panel with pre-v3 silicon
(the boot log says chip revision: v1.3 or another below v3.0), which is what these panels have shipped with
so far; rev3 silicon needs a firmware of its own.
You don't need to install the separate ESPHome Device Builder app. Tessera Screen Manager already includes the ESPHome CLI and can build firmware itself, install it via USB, put it on a screen plugged into your own computer from the browser, or give you the file, and later update it wirelessly over OTA.
Nothing to set up in Home Assistant. As soon as a flashed screen is on your Wi-Fi, Tessera adds it to Home Assistant's ESPHome integration with the screen's own key and allows it to perform Home Assistant actions, which a tile needs to control anything.
| Component | Needed? | What for? |
|---|---|---|
| Tessera Screen Manager app | Yes, for this installation route | Installing firmware, managing tiles, and sending current data to the screen |
| ESPHome Device Builder app | No, optional | Alternative editor and firmware installer; the same CLI is already in Tessera |
| ESPHome integration in HA | Yes, Tessera adds every screen to it by itself | The connection between Home Assistant and the physical screen |
So a fresh installation without ESPHome Device Builder also works. If there's
no ESPHome secrets.yaml yet, our wizard asks for Wi-Fi once and
stores it locally. Existing Wi-Fi secrets are reused. API and OTA keys
are generated per new screen and stay in that device's own profile.
For Home Assistant Container (Docker) without the App store, follow Install with Docker.
For Home Assistant OS with Apps/Add-ons on aarch64 or amd64:
-
Tessera is not in the standard App store, so add its repository first. One click does it:
Or add it by hand: open the App store, choose Repositories in the menu in the top right, and add
https://github.com/MaxGramser/homeassistant_espscreen. -
Install Tessera Screen Manager from the store, start the app, and open Tessera in the sidebar. ESPHome Device Builder is optional: the ESPHome CLI is already in this app.
-
Connect the screen with a USB data cable to the Home Assistant machine and click + beside Screens in the sidebar. New screen takes three steps: Screen (pick your board), Set up (name it and choose which way it hangs) and Install (choose USB on Home Assistant and click Install). If Wi-Fi is missing from the ESPHome
secrets.yaml, Set up asks for it once and Tessera only adds the missing lines. The profile with unique API and OTA keys goes into the ESPHome folder; the build and flash run in the same window (a first build takes a few minutes on a Raspberry Pi). Each screen gets its own profile. Is Home Assistant on a server or in a virtual machine, out of reach of the screen? Plug the screen into your own computer and choose From this computer in the Install step: Tessera builds the firmware and the page puts it on the screen, in Chrome or Edge with Home Assistant opened over https. Or choose Download the file and put it on the screen with ESPHome Web. After that, updates go over Wi-Fi as usual. -
CYD: go through the calibration on the screen. Guition: uses GT911 without resistive calibration. The screen joins your Wi-Fi and shows up in Tessera by itself.
-
Select the screen in Tessera, choose your tiles, and click Save & send. Then test the physical controls.

New screen, its first step (step 3 above), and choosing your tiles (step 5).
New firmware goes on over Wi-Fi with the Update button of a screen in Tessera, or by itself every night if you turn that on under Settings; Firmware & USB → Wi-Fi / OTA in the sidebar installs it by hand. For an existing screen, always use the existing profile; creating a new installation profile generates new keys.
The manual on the website walks through every step in more detail.
- The manual on the Tessera website: installing, pages, tiles, screen settings, cameras, Docker and troubleshooting.
- Full reference: every card and setting, alerts and wake/sleep from an automation, the top bar, the settings page on the screen, and how updates keep your settings.
- Guition hardware, mounting, and rotation · CYD calibration and USB diagnostics · Release history
ESP Screens was inspired by Adrian Kuehlewind's ESPHome-touch-display-mount, and its very first version started from his code. The project has gone its own way since, but his repository is still the place to go to give a CYD a proper home. It has beautiful 3D-printable desk, under-desk, wall and flush mounts.
Not to be confused with Tesserae (tesserae.ink), a separate open-source project that makes calm dashboards for e-ink panels in Home Assistant. Same word, different screens: Tessera is for colour LCD touch screens, Tesserae for e-ink. A question meant for the other project is gladly passed on.
The front door in the camera pictures is a photo by Virginia Marinova on Unsplash.
Tessera (formerly ESP Screens) is licensed under the GNU Affero General Public License v3.0, see LICENSE and NOTICE. Releases up to and including 0.4.38 were MIT licensed and stay so.